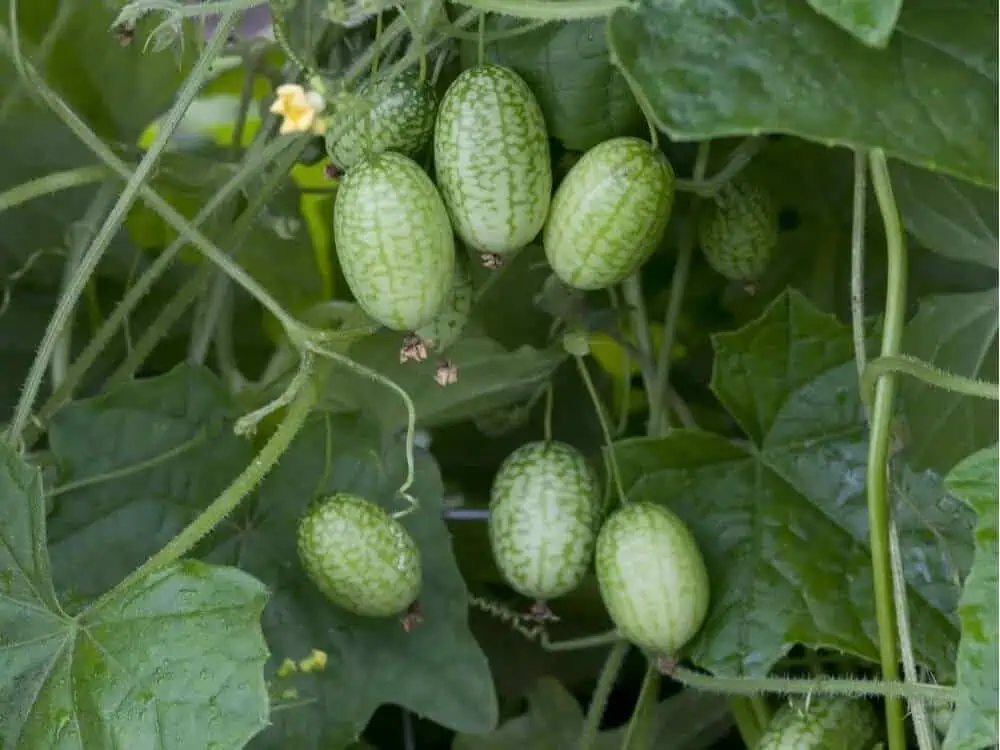
Cucamelons' fruits resemble tiny watermelons, but they taste more like cucumbers, with a pleasant tang that makes them especially good for fresh salads and pickling.
The plant, Melothria scabra, is a vigorous climbing vine native to Mexico and Central America.
Also known as mouse melons, Mexican miniature watermelons, or Mexican sour gherkins, cucamelons can grow several meters long, producing dozens of grape-sized fruits along their stems.
That makes them extremely productive for a small garden, provided you give the vines somewhere to climb.
Growing them in containers is quite easy, but there's one thing worth planning for before you sow a single seed. The roots need enough room to support the climbing growth above them, and the container must hold sufficient moisture.
Here are the practical tips that'll help you grow healthy cucamelon vines and enjoy a steady supply of those unusual little fruits.
12 Tips for Growing Cucamelons in Containers
1. Choose the Right Container Size
Cucamelons may produce small fruits, but their roots and vines need room to develop. A cramped container can restrict root growth, dry out quickly, and make it harder to keep the plant supplied with water and nutrients during the active growing season.
Start with a container holding at least 20 liters (about 5 gallons) of potting mix. A larger pot, around 30 litres or more, is worth considering if you have the space, especially in a hot climate where smaller containers dry out quickly.
As a general rule, choose a pot that's approximately 30 cm wide or larger, with enough depth to accommodate a healthy root system. The exact dimensions matter less than the overall volume, stability, and quality of drainage.
Plastic, glazed ceramic, and other moisture-retaining containers are ideal if you live somewhere hot or can't water frequently. Terracotta is another option, although its porous walls allow moisture to evaporate more quickly.
Most importantly, check that the bottom has several drainage holes.
A useful tip: Grow one cucamelon plant per container. A single mature vine can fill a trellis, so you don't need several plants competing for root space to make the most of a small patio.
2. Start Cucamelons from Seed
Seeds are the easiest way to establish cucamelons. You can start them indoors in small pots or sow them directly into their final container once the weather is warm enough.
Cucamelon seeds need warmth to germinate. For better results, aim for a growing medium temperature of approximately 22 to 24°C (72 to 75°F.
Fill small pots with a fine-textured seed-starting mix, moisten it, and sow the seeds about 6 mm (¼ inch) deep. Cover lightly with mix and keep the surface consistently moist.
Germination can take around one to three weeks, depending on temperature and seed quality. Avoid saturating the pots in an attempt to speed things up, as excess moisture can cause seeds to rot.
Once the seedlings emerge, give them plenty of bright light. If you're growing them indoors, a sunny windowsill or suitable grow light will help prevent weak, stretched growth.
When the seedlings have developed true leaves and the weather is warm, harden them off before moving them outdoors. To harden, gradually expose them to outdoor conditions over several days, then transplant carefully to avoid damaging the tender roots and stems.
If you prefer to sow directly into the final container, sow two or three seeds and thin them to the strongest seedling once they've established.
This option is practical when you have limited space for raising seedlings separately.
3. Use a Light, Well-Draining Potting Mix
The soil in a container behaves differently from garden soil. It has a limited volume, receives frequent watering, and can become compacted if the growing medium isn't suitable.
For cucamelons, use a good-quality potting mix that retains moisture while allowing excess water to drain freely. A commercial vegetable potting mix is a convenient starting point.
You can also improve a suitable base mix with mature compost for organic matter, or perlite if the mix needs better aeration.
However, you have to be cautious with compost because, although it supplies organic matter and nutrients, its texture and water-holding capacity vary considerably. A balanced potting mix gives you more predictable results.
Fill the container to about 2.5 cm (1 inch) below the rim. This leaves enough space to water without washing the mix over the sides.
Pro Tip: Don't put gravel or stones at the bottom to improve drainage. They take up useful root space and don't solve drainage problems in an unsuitable mix. Open drainage holes and a well-structured potting medium are what you need.
4. Give the Vines a Strong Trellis
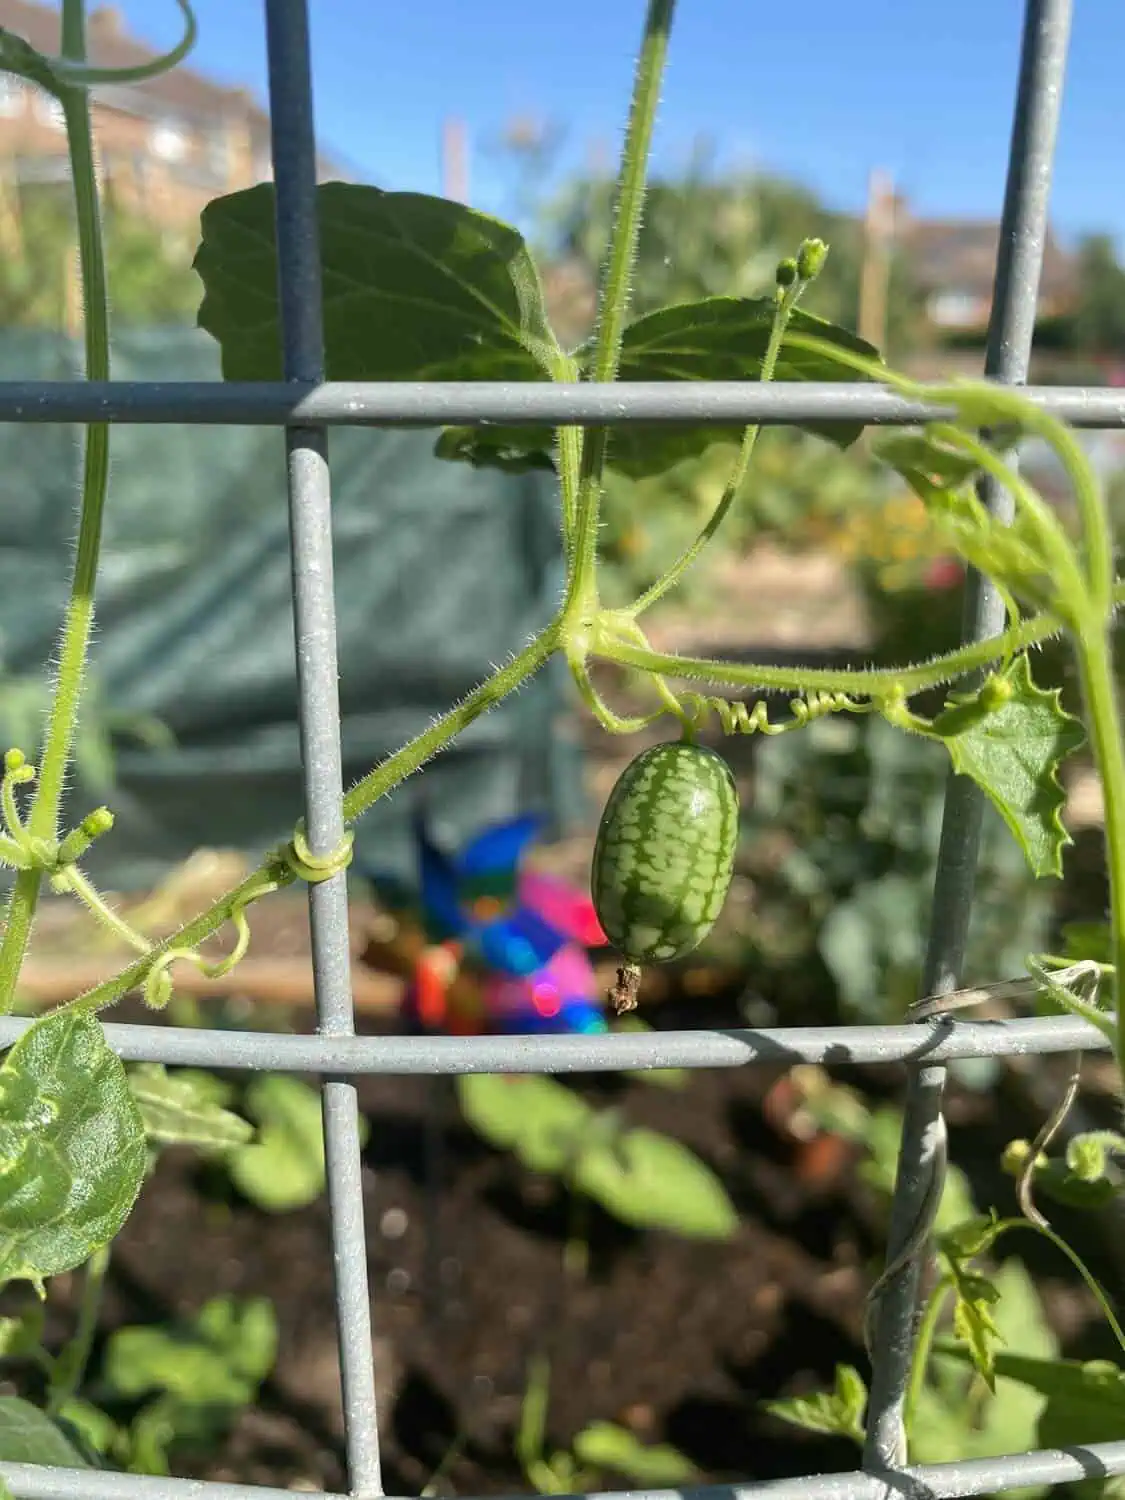
This is one of the most important parts of growing cucamelons in containers.
The plant is a natural climber, using curling tendrils to attach itself to nearby supports, and mature vines can reach around 2.5 to 4 metres under suitable conditions.
Without support, the stems spread across the ground or trail over the sides of the container. This uses more space, makes harvesting challenging, and allows fruits to rest against damp surfaces where slugs and other pests may damage them.
Install a sturdy trellis before the vine becomes difficult to handle. A mesh panel, bamboo frame, wire support, or freestanding garden trellis can work well. Aim for a height of around 1.5 to 2 metres if space permits, and secure the structure firmly.
Remember that the support must withstand more than the weight of the stems. A mature vine covered in foliage can catch the wind, particularly on an exposed balcony.
As new growth develops, guide the stems towards the support. The tendrils will usually grip it naturally, although you can use soft plant ties to secure wandering stems when necessary.
Avoid pulling or bending the shoots sharply. Cucamelon stems are slender and can break if handled roughly.
Growing vertically also makes it much easier to spot the fruits. Once the vine becomes dense, some cucamelons can disappear behind the leaves, only to be discovered when they've grown larger than you'd intended.
5. Find a Sunny Position
Cucamelons are warm-season plants that grow best in a sunny, sheltered position. Aim for around six to eight hours of direct sunlight daily, adjusting for your local climate and the intensity of the afternoon sun.
A sunny patio, balcony, or garden corner is ideal, provided there's enough room for the trellis. Don't rely on a position that receives only a little morning light if you want a good crop.
In particularly hot weather, however, full afternoon sun can heat the container and dry the root zone quickly. This is where container choice and positioning become important.
If your pot sits on a heat-reflecting concrete surface or against a sunbaked wall, monitor it closely during the hottest part of the day. You might need to shade the container itself, move it to a slightly more sheltered position, or water more frequently.
Keep in mind that cucamelons still need good light for flowering and fruiting. Deep shade is unlikely to solve heat stress without creating other problems.
If you're unsure about the best position, observe the plant for a week or two. Healthy growth, firm leaves, and regular flowering are useful signs that the balance of light and warmth is working.
6. Water Consistently, Especially During Fruiting
One of the challenges of container gardening is that the potting mix can dry out much faster than soil in a garden bed. This becomes particularly noticeable when cucamelon vines are large and producing fruit.
Check the surface of the potting mix regularly. When the top 2 to 3 cm feels dry, water thoroughly until excess water runs from the drainage holes.
The frequency will depend on the container size, temperature, wind, and stage of growth. In warm weather, daily watering may be necessary, while cooler conditions may allow longer intervals.
Try not to let the potting mix swing repeatedly between bone-dry and waterlogged. Consistent moisture helps support growth and fruit development, while excessive wetness can damage the roots.
Water around the base of the plant rather than repeatedly soaking the foliage. This is particularly helpful when conditions are humid, and leaves take a long time to dry.
A thin layer of straw or other suitable organic mulch can help conserve moisture. Keep it slightly away from the main stem to avoid trapping moisture around the stem base.
If the plant wilts, check the potting mix before reaching for the watering can. A dry mix usually indicates that watering is needed, while a persistently wet mix suggests a drainage or root problem.
7. Feeding the Plant
As cucamelons grow, they use nutrients to develop stems, leaves, flowers, and fruits. Unlike plants growing in the ground, container-grown vines have access to a limited supply of nutrients, and frequent watering can gradually wash some of them out.
If you've used fresh, nutrient-enriched potting mix, you may not need to feed immediately. As the plant establishes itself and begins growing vigorously, start using a liquid fertilizer suitable for fruiting vegetables.
Follow the product's label for dilution and application frequency. A balanced vegetable fertilizer is a sensible choice, while a product formulated for tomatoes and other fruiting crops can also work.
Be careful with excessive nitrogen. Nitrogen encourages leafy growth, and too much can leave you with a vigorous vine but disappointing fruit production. Healthy green leaves are welcome, but they aren't the final goal.
Once flowering and fruiting begin, continue feeding sensibly according to the product instructions and the plant's condition. There's no need to pile on different fertilizers or assume a lack of fruit means the plant needs more nutrients.
If your vine is already lush and healthy but producing few fruits, look at pollination, light, and flowering patterns before changing the feeding routine.
8. Pollination
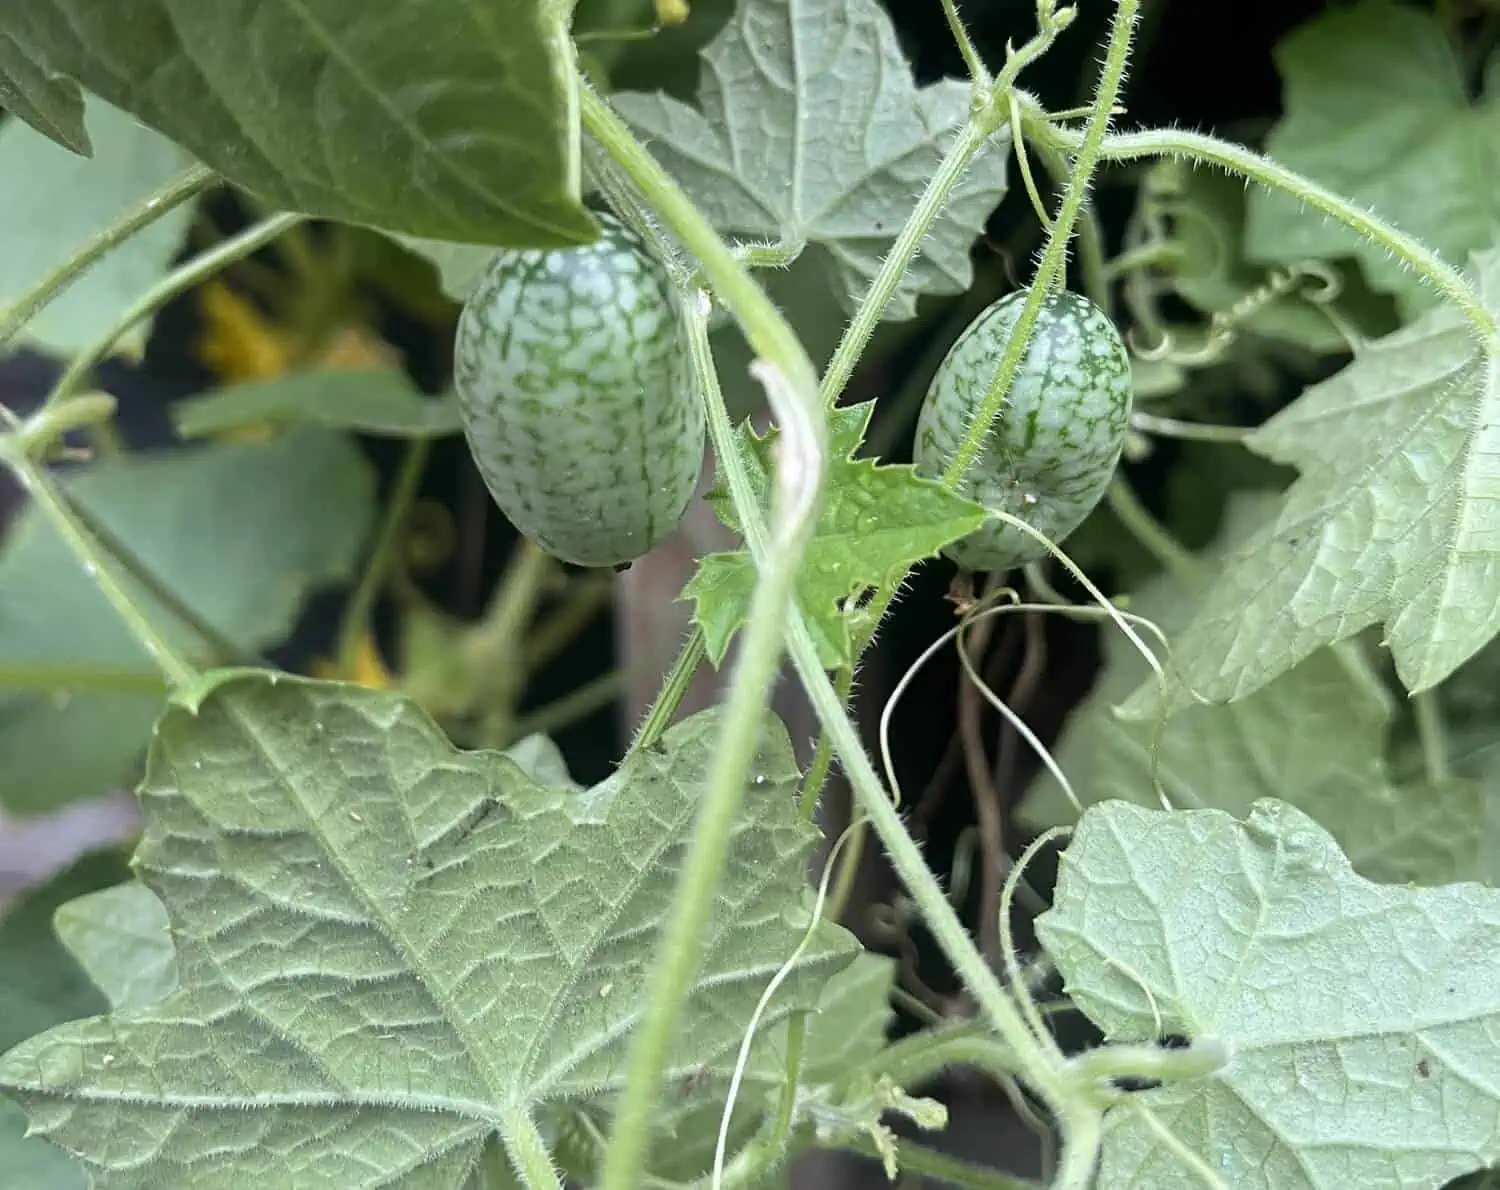
Cucamelons produce small yellow flowers along their stems. The flowers are easy to overlook among the foliage, but they're where your harvest begins.
The plant produces separate male and female flowers. Female flowers have a tiny swelling behind the petals, which develops into a fruit after successful pollination. Male flowers provide the pollen.
Interestingly, cucamelons can produce female flowers before male flowers, the opposite of what many gardeners expect from ordinary cucumbers.
So, if you spot flowers without developing fruits early in the season, give the plant some time to produce the other type of flower.
Bees and other visiting insects can help transfer pollen. If your container is on a sheltered balcony or a place where pollinators rarely visit, fruit set may be less reliable.
When female flowers appear but repeatedly fail to develop, you can try hand-pollination. In the morning, use a small paintbrush to pick up pollen from an open male flower and gently transfer it to the center of a female flower.
You can also carefully touch the center of the male flower to that of the female flower. Repeat with other open female flowers, then watch for their small swellings to enlarge over the following days.
There's no need to hand-pollinate every flower if the plant is producing fruit normally. Treat it as a practical troubleshooting step when pollination seems to be the problem.
9. Training and Pruning
Once established, cucamelons tend to climb aggressively. Their tendrils do most of the work, so your main task is to keep growth distributed across the trellis and prevent the vine from tangling.
Guide new shoots towards open sections of the support. Spreading them out improves airflow and makes flowers and fruit easier to inspect.
Routine pruning generally isn't necessary. If a stem grows far beyond the available space, redirect it along the trellis or trim it selectively. Remove damaged or diseased growth when needed, using clean pruning scissors.
Avoid cutting back healthy stems simply to make the plant look neater. Those stems may carry flowers and fruits, and removing too much growth can reduce your eventual harvest.
As the vine fills out, check it regularly for tangled stems and hidden fruits. A few minutes of gentle training now can save you from trying to untangle a dense mass of growth later.
10. When and How to Harvest Cucamelons
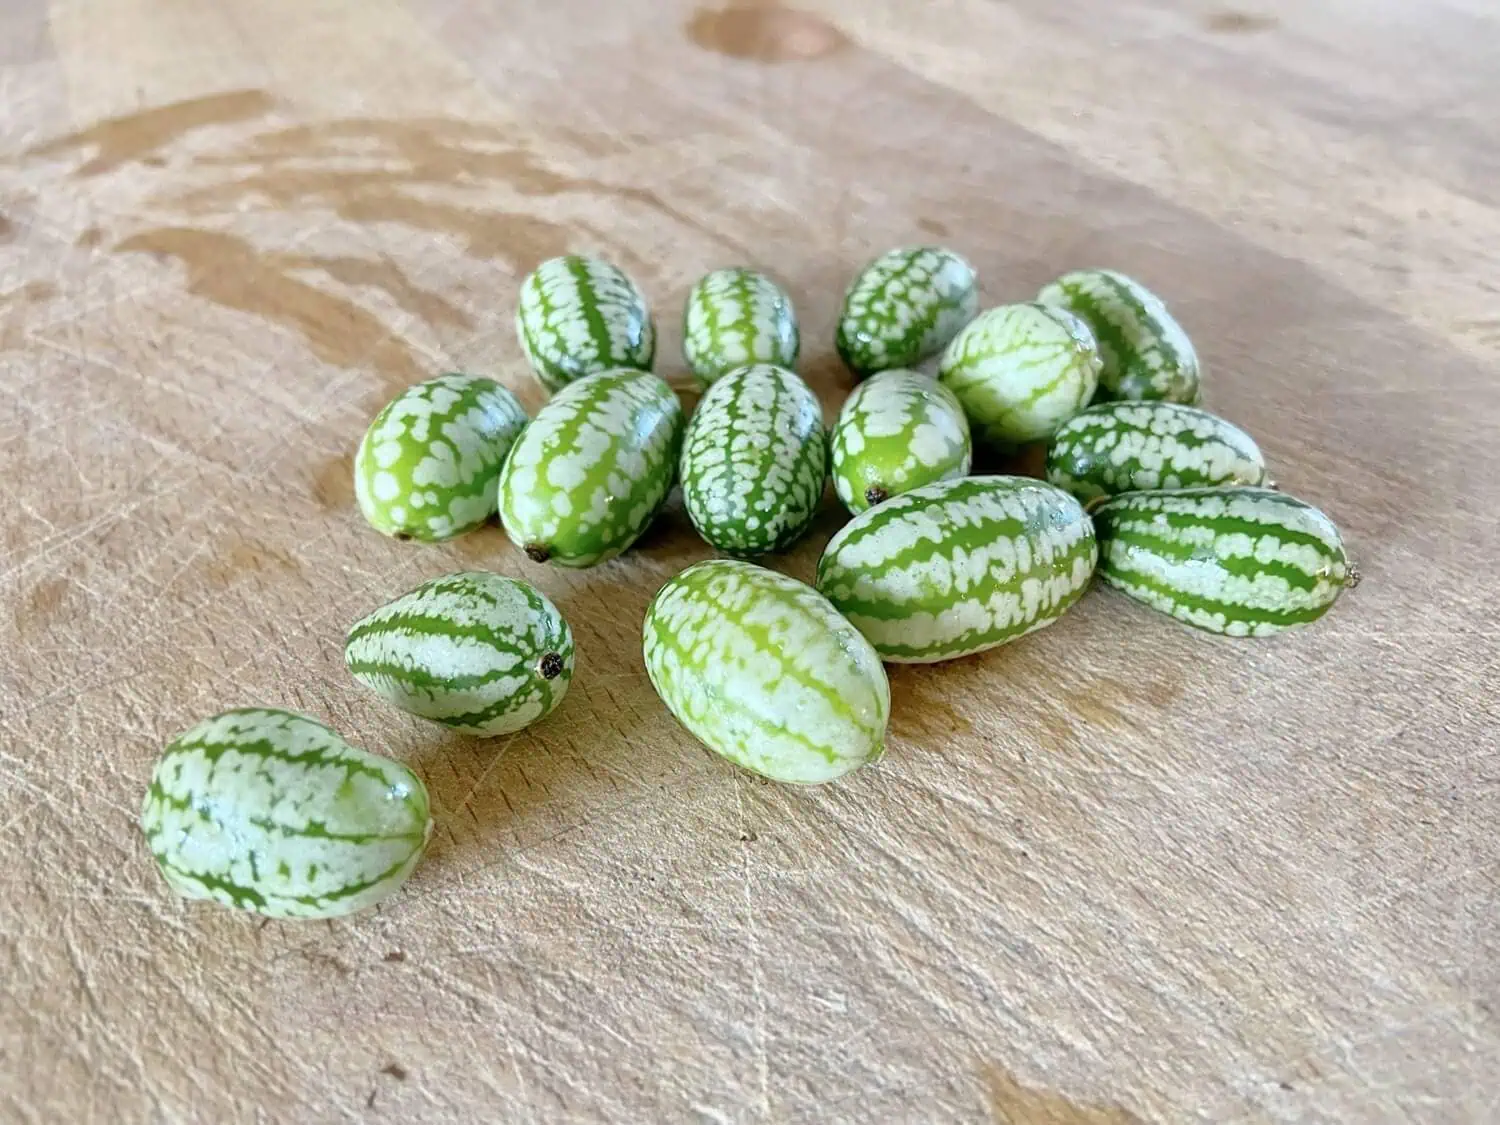
Cucamelons are usually ready when the fruits are firm, green, and around 2 to 3 cm long. Their pale stripes resemble those of miniature watermelons, while the flesh is crisp and cucumber-like, with a refreshing tartness.
It's tempting to leave them on the vine to see how large they'll grow. Resist that temptation if you're growing them for fresh eating. Younger fruits generally have a more pleasant texture, while older fruits can become tougher and develop more noticeable seeds.
Inspect the vines every two or three days during the main harvesting period. The fruits can hide behind leaves, and checking regularly helps you catch them at the right stage.
Use scissors or small pruning snips to cut the fruits from the stems. Pulling or twisting them off can damage the delicate vine, especially when several fruits are growing close together.
Once harvested, the fruits are quite versatile in the kitchen. You can eat them fresh, toss them into salads, add them to salsa, or pickle them for a crunchy, tangy snack. Their small size also makes them convenient for serving whole.
11. Troubleshoot Common Growing Problems
Cucamelons are generally trouble-free plants, but container conditions can still create challenges. The important thing is to identify the cause before making any changes, as in diagnosing before prescribing.
Diseases
You may notice the leaves developing white, powdery patches. This may be powdery mildew, a fungal disease that can affect cucurbits.
Ensure that you improve airflow, avoid overcrowding the foliage, and remove severely affected leaves. If the problem spreads, use a treatment labelled for the disease and edible crops, following all the instructions on the label.
Pests
If you notice that the young stems or fruits have been damaged, the cause is almost always pest infestations.
Particularly, check for slugs, snails, and other pests, especially in damp areas, and take the necessary control measures. For instance, growing the vine vertically reduces the number of fruits resting on the ground and makes the plant easier to inspect.
12. Save Seeds or Prep the Plant for Another Season
These plants are tender perennial vines, although gardeners in many climates grow them as annuals. They can develop underground storage tubers that allow established plants to regrow after dormancy.
If you live somewhere with frost, leaving the plant outdoors through winter can destroy those tubers. You may be able to lift them after the vine dies back and store them in slightly moist compost in a frost-free place.
Keep the storage medium only slightly moist. Excessive wetness can cause rot, while allowing the tubers to dry out completely can damage them. Replant them when conditions become warm enough for active growth.
You can also save seeds for next season. Choose fully mature fruits and allow them to ripen beyond the stage at which you'd normally eat them. This guide covers how to extract, clean, and dry the seeds for storage.
Conclusion
The wonderful thing about cucamelons is how much they can produce without occupying much ground space. A single plant can climb a trellis, create an attractive screen of foliage, and supply a succession of little fruits for the kitchen.
Have you tried growing cucamelons in containers, or are you planning to grow them for the first time?
Share your experience, and save this guide to Pinterest or Facebook so that you can refer to it when you're ready to plant.