Turmeric (Curcuma longa), the golden spice known for its incredible health benefits and vibrant color, is surprisingly easy to grow at home.
Even if you don’t have a garden, you can cultivate turmeric in containers right on your balcony, patio, or indoors.
Growing turmeric not only provides fresh, organic rhizomes but also adds a touch of tropical beauty to your space. In this guide, we’ll walk you through the entire process of growing turmeric in containers, ensuring a successful harvest regardless of where you live.
Choosing the Right Container

Image Credit: Gardening Know How
Turmeric requires ample space for its roots to spread.
Choose a container that is at least 12–18 inches in diameter and 12 inches deep. Ensure it has drainage holes to prevent waterlogging.
Go for materials such as plastic, ceramic, or fabric grow bags, as they retain moisture while allowing proper aeration.
A self-watering container can be a great choice to maintain consistent moisture levels. Additionally, using a container with a saucer can help manage excess water runoff without causing root rot.
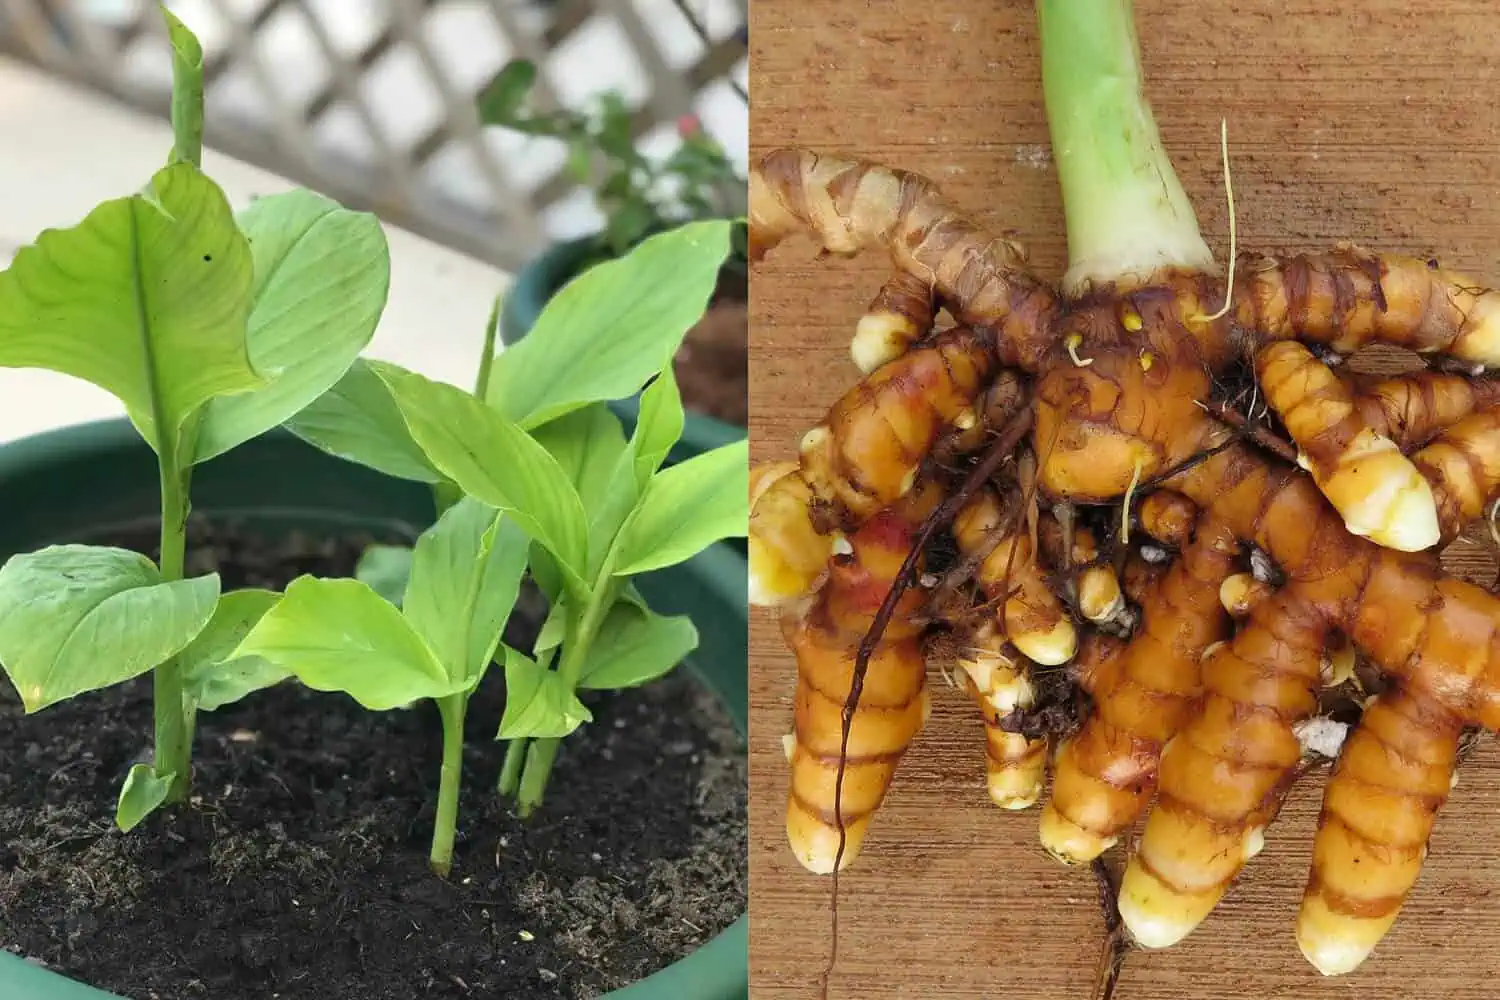
Selecting and Preparing Turmeric Rhizomes

Image Credit: David Eickhoff via Flickr
Start with fresh turmeric rhizomes, preferably from an organic source. Look for pieces with small buds or ‘eyes’ on them.
Cut larger rhizomes into smaller sections, making sure each piece has at least one bud. Let them dry for a day before planting to prevent rotting.
Preparing the Potting Mix

Preparing the right potting mix for turmeric is essential to ensure healthy growth and a good harvest.
Like other potted plants, turmeric thrives in well-draining, nutrient-rich soil with good moisture retention. Here's how to make an ideal potting mix:
DIY Potting Mix – What You’ll Require
- Garden Soil (30%) – Provides a natural base with minerals.
- Coco Peat or Peat Moss (30%) – Helps retain moisture while keeping the mix light.
- Compost or Well-Rotted Manure (20%) – Provides organic nutrients and improves soil fertility.
- Perlite or Sand (10%) – Ensures proper aeration and drainage.
- Neem Cake or Powder (5%) – Acts as a natural pest repellent and adds nutrients.
- Bone Meal or Rock Phosphate (5%) – Boosts phosphorus for healthy root and rhizome development.
To prepare the mix, get a clean working area preferably on a concrete floor pre-washed with bleach and dried. Alternatively, use a large container. Then, pour all your ingredients above and mix thoroughly.
Pour a little bit of water to moisten the mix and then you’re ready to proceed to the next step.
Planting the Turmeric Rhizomes
Start by filling the container with potting mix up to three-quarters full. Then, plant the turmeric rhizomes about 2 inches deep with the buds facing up.
Slightly cover the rhizome buds with more mix. Do not plant the turmeric rhizome right on the soil surface or too deep.
If planted right on the surface, the rhizome will be exposed to the sun and dry out. On the other hand, if you plant too deep into the soil it will be difficult to emerge.
Besides, you should space them at least 4 inches apart if planting multiple rhizomes in a large container. Water lightly after planting. To promote faster sprouting, keep the soil consistently warm and moist, ideally around 75°F (24°C).
Lastly, mulch by adding a layer of dried leaves or straw on top to retain moisture and prevent weeds
Turmeric rhizomes may take 4–7 weeks to sprout so you need to be patient.
Turmeric Plant Care

Sunlight
Like their close relatives, the ginger, turmeric thrives in warm temperatures and partial to full sunlight.
Place the container where it receives at least 6–8 hours of indirect or dappled sunlight daily.
Watering
Water your plants in such a way that water gets drained out of the drainage holes at the bottom. Watering frequency will depend on factors in your area such as temperature, soil type, growing season, and humidity.
The general rule of thumb is to water the plants when the top one-and-a-half inches of soil dries up.
However, during the active growing period from spring to late summer, the plants like their soil moist at all times. Do not let it become bone dry.
When the plants are young, keep the soil moist at all times. As they mature, you can reduce the watering frequency.
Humidity and Temperature
Ideal temperatures range between 70–85°F (21–29°C). If growing indoors, maintain humidity levels by misting the plant occasionally.
Fertilizing and Pest Control
Feed your turmeric plant with organic compost or a balanced liquid fertilizer every 3–4 weeks.
Keep an eye out for pests like aphids and spider mites, which can be managed with neem oil or insecticidal soap.
Harvesting Your Turmeric

Turmeric takes about 8–10 months to mature.
To harvest the rhizomes, first, loosen the topsoil using a shovel. Do not pull the entire plant out without loosening up the soil. Once the soil is loose, break the rhizome and take out the turmeric.
These plants are ready for harvest once the leaves start turning yellow and drying out. When that happens, gently dig up the rhizomes, rinse them thoroughly, and allow them to dry before using or storing them.
Conclusion
Growing turmeric in containers is a rewarding experience that provides fresh, organic turmeric right at your fingertips.
With the right care and patience, you can enjoy homegrown turmeric for cooking, health remedies, or even replanting.
I hope this guide on how to grow turmeric in containers has been helpful. If so, consider sharing it with others.
Featured image credit: Rural Sprouts & David Eickhoff via Flickr