Are you wondering if you can grow sweet potatoes (Ipomoea batatas) at home? You can!
Sweet potatoes are tropical climbers grown for their edible tuberous roots. They are members of the morning glory family and are originally from Central and South America. The foliage and flowers closely resemble those of the morning glory.
Although they have ‘potato’ in their name, they are not related to the white Irish potatoes belonging to the nightshade family. Additionally, the edible portion of sweet potatoes is the tuberous root, not a true tuber from the technically modified plant stems.
These root vegetables have deep-orange flesh and a coppery skin jacket. They are commonly served either cooked and mashed or roasted whole. You can also use them as pie fillers.
Now that you have the basics, let’s take a look at how to start the slips and grow sweet potatoes step by step.
A Step-by-Step Guide on How to Grow Sweet Potatoes at Home
Choose the Right Sweet Potato

When it comes to sprouting, not all sweet potatoes are equal. Some conventional ones have a delayed sprouting rate due to the anti-sprouting hormone treatment. The hormone can also completely alter the sprouting process.
So, consider organic sweet potatoes from a local market. These tend to sprout more willingly and quickly.
You don’t need freshly harvested ones. The fact is, slightly older potatoes often sprout faster because they have surpassed their natural dormant stage, triggering a biological directive to grow into a new plant.
When exposed to the right amount of light, temperature, and humidity, the stored nutrients in potatoes break down their dormancy and sprout quickly.
This is an important decision, because it dictates the overall quality of your sweet potatoes.
Starting the Slips
Sweet potatoes don’t grow from seeds in the way tomatoes or beans do. Instead, they grow from slips, which are basically shoots that sprout from a mature sweet potato. Think of the potato as a kind of launchpad, and the slips as the rockets.
Each slip can grow into a full plant. That’s why one sweet potato can turn into a surprisingly generous harvest.
It’s also why starting your own slips is such a smart move. You multiply your planting material without spending much at all.
Select a Suitable Method to Start the Slips
There are two ways to produce the slips. All you need to do is consider the one that fits your space and patience.
Method 1: Starting Sweet Potato Slips in Water

This is probably the most popular among growers. However, it is less preferred than soil since it requires more time.
Start by sticking toothpicks into the sides of the sweet potato, then suspend it halfway in a jar of water with toothpicks on top of the jar. Ensure that the bottom sits on water while the top stays dry.
Place it (The jar + the potato suspended in water) somewhere warm and bright, and change the water every few days.
Within 2 to 8 weeks, roots begin to form from below, and shoots start to push out from the top. Once they are full-size and have a few leaves, gently break the stem off the sweet potato and place it in moist potting soil in a container.
Ensure the stem is buried an inch or so in the potting soil. But the leaves must be kept above the soil level. This process allows the slip to form roots.
Once the roots have formed, harden them off before planting in the garden.
Method 2: Starting Sweet Potato Slips in Soil

Photo: athomeontheprairie.com
This method feels a bit more natural. Start by laying the sweet potato on its side in a tray of moist soil and lightly covering it. Keep the soil damp, not soggy, and place it in a warm environment.
The soil method often produces sturdier slips, and in about 3 to 4 weeks, the slips form. Usually faster than in water.
One advantage of the soil method is that as the slips grow, they form roots in the soil. This cuts out an entire step of rooting them. Since they already have roots, you can plant them directly in the soil or in containers until they are ready.
Pro Tip: In both methods, hardening off the sweet potato slips is key. Do this by placing them in a container and covering the roots with a moist seed-starting soil mix.
Then, when it’s warm enough, take them outside for half an hour, then back inside.
Continue extending the time to an hour, two, three, until you reach full eight hours, after which you can plant when the soil is warm.
Planting your Potato Slips

Photo: Practicalselfreliance.com
Sweet potatoes love warmth, so plant when the soil is consistently warm (approximately above 15ºC). In most places, it’s usually a few weeks after the last frost, but if you live in warmer areas, you are more flexible.
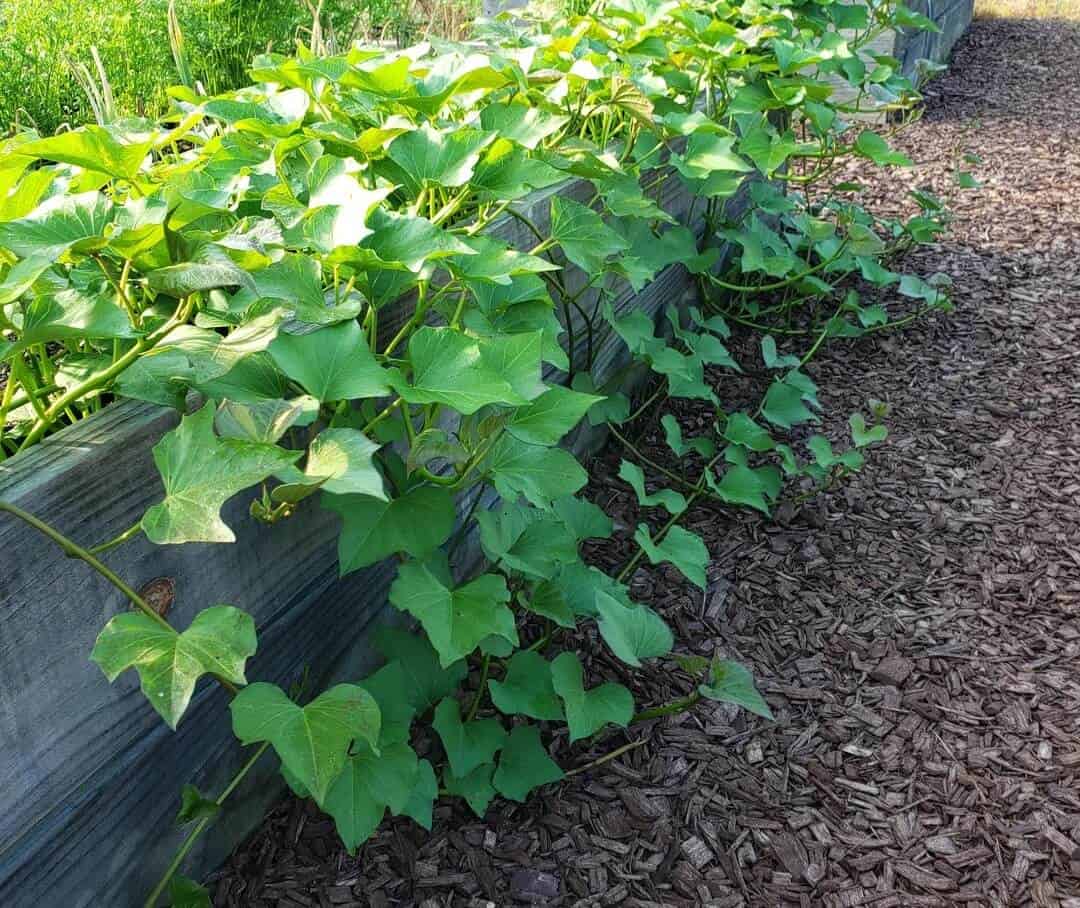
Now that your slips have rooted, it’s time to transplant them. Plant them deep enough so that at least half the stem is buried. This encourages more root development along the stem.
Space them out generously, about 30 to 45 centimeters apart, to allow some space to sprawl.
Water them well after planting, then keep the soil consistently moist for the first couple of weeks. After that, water them only when needed as they’re surprisingly resilient plants. The main idea here is to give them a strong start. Good spacing and proper planting depth guarantee you a bountiful, healthy harvest.
Tip: Sweet potatoes prefer loose, well-drained soil for their roots to spread. If your soil is heavy, mix compost or sand to loosen it or use raised beds.
If you choose to grow sweet potatoes in containers, consider pots that are at least 30cm wide and fill them with peat-free multi-purpose compost. Next, plant at the center and set it at the same depth as before, firm it gently, and water well.
You can also plant it in a grow bag and keep it indoors in a greenhouse or a cold frame, or outdoors in a very warm, sunny, sheltered space. If possible, cover containers placed outside with a cloche or plastic-free fleece for a better crop.
Care for your Sweet Potato Plants

Image: BH&G
Mulch and Water your Plants
Throughout their growing season, especially the initial stages, sweet potatoes require consistent moisture levels. It’s hence crucial to water deeply, but be careful not to overwater as this might lead to plant rots.
To maintain moisture levels, once the plants have fully established, apply an organic mulch on the soil. You can use shredded leaves or straw, which also helps suppress weeds and regulate soil temperature.
Nutrient Management
Sweet potatoes have minimal fertilizer requirements. For enhanced root development, apply phosphorus and potassium fertilizers during the planting phase.
Avoid excess nitrogen, as it promotes foliage growth while inhibiting root development.
Prune and Train the Sweet Potatoes
Prune the sweet potato vines whenever needed throughout the growing period. Use sterilized pruning shears to remove dead, damaged, or diseased vines.
Through pruning, you train the vines and prevent them from spreading everywhere.
Pests and Disease Management
The most common pests in sweet potato plants are aphids, sweet potato weevils, and whiteflies. For control, use organic options such as insecticidal soaps or neem oil.
Additionally, maintain regular crop rotation and good sanitation to minimize the spread of diseases.
When and how to harvest Sweet Potatoes

After about 3 to 4 months, the leaves may start to yellow. But you can prolong the growing even further (up to 150 days) to extend the harvest season if the weather is favorable.
To harvest, gently dig around the base of the plant and lift the tubers out. They can be delicate, so go slow. It’s a bit like a treasure hunt; you never quite know what you’ll find beneath the soil.
However, freshly harvested sweet potatoes aren’t at their best yet, though. They need to cure to allow some of the starch to convert into sugar.
To achieve this, leave them in a dark, warm, humid place for about a week to toughen the skin and develop desired sweetness. This way, the flavor deepens, and the texture improves.
Store your harvested and cured produce in a cool, dark place with proper ventilation to extend their shelf life.
Conclusion
As you’ve seen from the article, it is possible to grow sweet potatoes and start the slips, provided you follow the steps above.
With the information I have shared above, I trust that growing sweet potatoes will be more fun for you and that you can’t wait for the growing season to start.
What matters more is the pride in producing a healthy, bountiful harvest from a few, even old sweet potatoes that could otherwise have gone to waste. Imagine starting with one piece and ending up with many, and one season leads to the next.
And once you’ve grown your own slips, it’s hard to go back to buying them. Not because you can’t, but because you’ve seen how easy it is to start from almost nothing.