In my native home in western Kenya, the loofah plant, also known as Luffa, grows like a weed. Often found in fences and trailing around other trees. What’s more interesting is that the seeds tend to disperse and sow on their own.
Fascinatingly, what starts as a fast-growing vine that almost takes care of itself ends up as a sponge in kitchens and bathrooms that most homes can’t do without.
Now, I understand that the rest of the world, where this plant isn’t native, doesn’t have the same luxury.
The only way is to actively grow and care for it if you want to enjoy similar benefits. And what’s more rewarding than planting a seed, tending a vine, and months later, you’re holding something that looks like it came from a factory – your very own loofah sponge.
More importantly, an abundance of it.
If you’ve ever been curious about trying it at home, here’s a step-by-step guide that walks you through the entire process of growing a loofah sponge plant.
About the Loofah Plant
Although this might sound new depending on where you come from, the loofah plant is considered a delicious vegetable in some Asian countries. But it has to be harvested at an early stage of development to be edible.
Botanically, the luffa is known as Luffa aegyptiaca and belongs to a genus of tropical and subtropical vines in the pumpkin, cucumber, squash, and gourd family (Cucurbitaceae).
For this guide, we’ll focus on the fruit, which is allowed to mature and used as a bath or kitchen sponge after being processed to remove everything except the network of xylem fibers.
9 Easy Steps for Growing a Luffa Sponge Plant at Home
Step 1: Sow and Start Your Seeds Early

Loofah seeds have a reputation for being stubborn in terms of germination. They don’t always germinate quickly, and when they do, they like warmth.
I’ve found that soaking the seeds in warm water for about 24 hours makes a noticeable difference. It softens the outer shell and nudges them to wake up.
After soaking, plant them about 2 to 3 cm deep in seed trays or small pots filled with light, well-draining soil. Keep them warm, ideally at around 25-30°C. A sunny windowsill or greenhouse works well.
Germination can take anywhere from a week to three weeks. During that time, the soil should stay slightly moist without being soggy. Seed starting is not always a straightforward affair for most beginners; that’s why I have a whole guide about it.
Here’s the guide - A Definitive Guide to Indoor Seed Starting for Beginners.
Step 2: Choosing the Planting Location
Once your seedlings are strong enough, it’s time to think about their permanent home.
Loofah vines don’t grow in a compact habit. Instead, they stretch, climb, and sprawl with enthusiasm. So, pick a spot with full sun and plenty of vertical space. A trellis, fence, or even a sturdy arch works beautifully.
You can even be creative and construct a pergola and let them sprawl on top while providing the much-needed shade.
If you’re growing in a garden, enrich the soil with compost. If you’re using containers, choose large pots of at least 20 liters with good drainage.
What matters most is sunlight and support. The more sun the plant gets, the better your chances of healthy vines and well-formed sponges.
Step 3: Transplanting

When your seedlings have a few true leaves, and the weather is consistently warm, you can transplant them outdoors. If you’re not sure what the true leaves look like, check the image above.
The seedling on the right has one true leaf, while the rest are false.
Be gentle with the roots when transplanting because Loofah doesn’t love being disturbed, so try to keep the root ball intact. Plant them at the same depth they were growing in their pots or trays.
Water them well after transplanting, and for the first week or two, keep an eye on them. They might sulk a little, but once they settle in, growth picks up quickly.
Step 4: Training the Vines
As the vines grow, guide them onto your trellis or support structure. If you leave them to sprawl on the ground, the fruits can become misshapen or rot.
You don’t need to micromanage, just gently nudge the tendrils in the right direction. They’ll grab onto the support and climb on their own.
Over time, you’ll notice the plant taking over its space in the most satisfying way. Training and supporting them early enough leads to better air circulation, prevents diseases, and subsequently, cleaner sponges.
Step 5: Watering and Fertilizer Application
Like other members of the Cucurbitaceae family, these plants require a lot of water, especially in hot, drier months.
Always remember to keep the soil evenly moist, but not waterlogged. Deep watering a few times a week is better than light daily sprinkles. It encourages stronger roots.
As for feeding, a balanced fertilizer every few weeks works well. Too much nitrogen can lead to lots of leaves but fewer fruits, so don’t overdo it.
Step 6: The Flowering Stage
If all goes well, you should start seeing bright yellow flowers after the first two months. Sometimes earlier or later, depending on the prevailing weather conditions.
The plants produce both male and female flowers. Bees usually handle pollination, but if you notice lots of flowers and no fruits, you can step in and hand-pollinate.
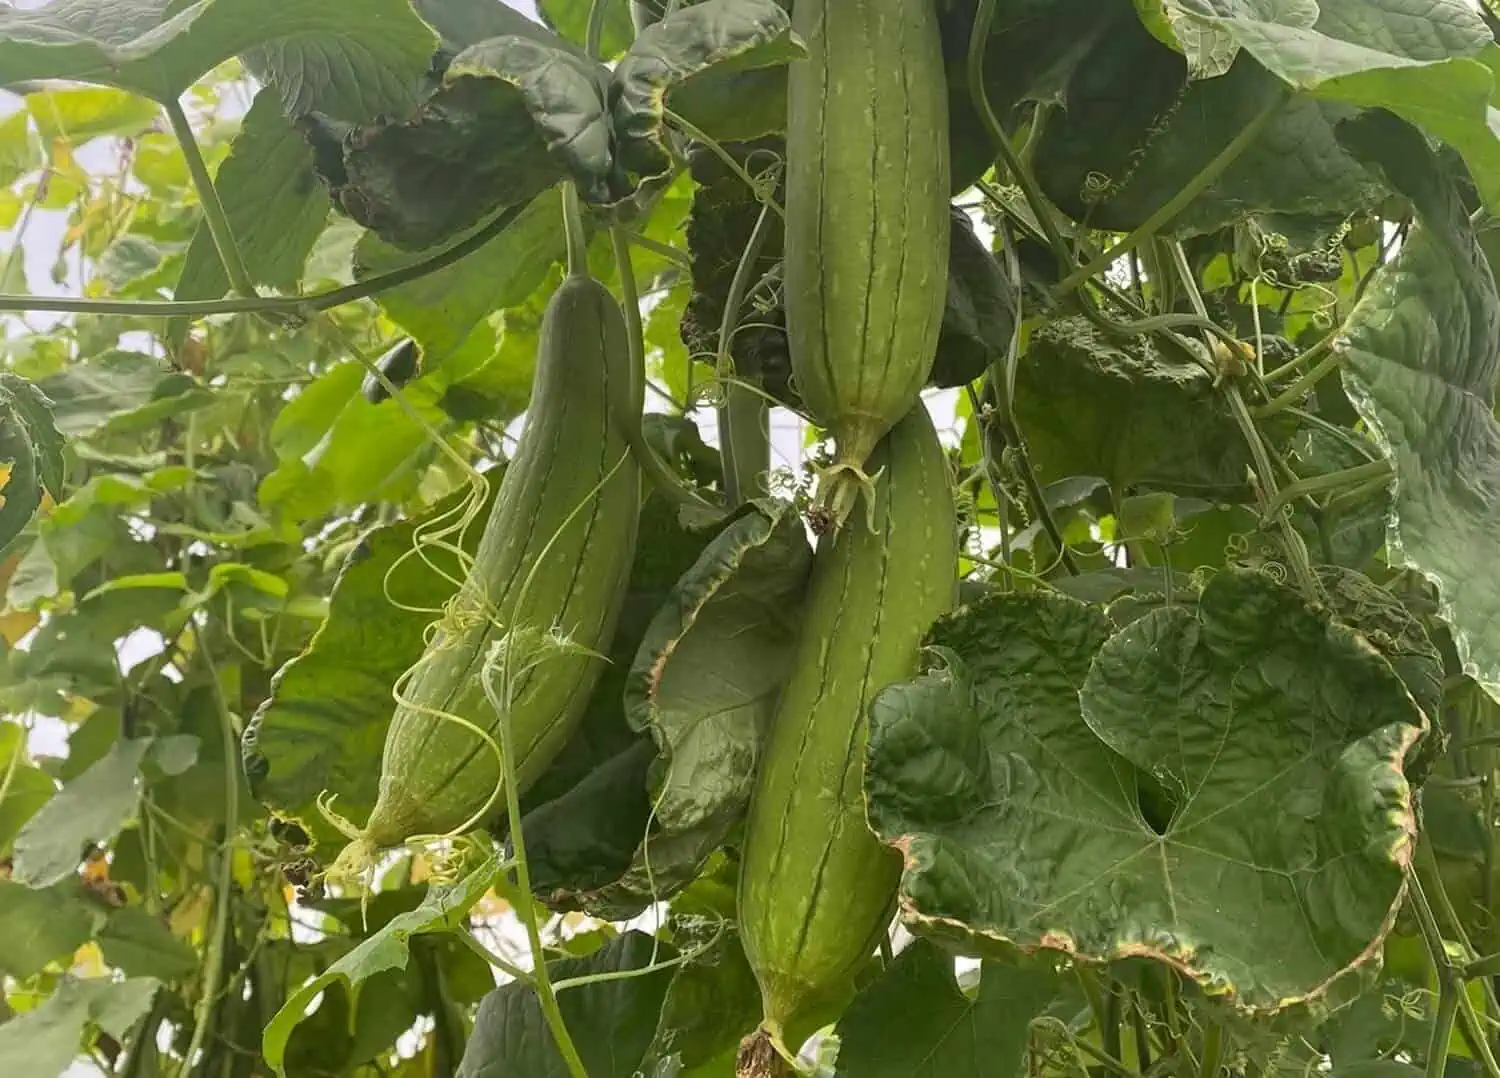
Once pollinated, the fruits begin to form. They look like long, green cucumbers at first, and they grow surprisingly fast. Whatever you do, don’t rush to harvest before the fruits are fully mature.
Step 7: Mature Fruits and Harvesting

For a usable sponge, the fruit needs to stay on the vine until it matures and dries out. It will turn yellow or brown, feel lighter, and the skin may start to loosen.
If you harvest too early, the inside will be soft and undeveloped. In general, the loofah plant takes anywhere between 150 and 200 days from seed to sponge.
In wetter climates, you might need to pick them slightly early and finish drying indoors to prevent rotting. A well-ventilated space works best for drying the harvested fruits.
Step 8: Peel, Clean, and Reveal the Sponge

Image Credit: Zchumpon via Shutterstock
Once the loofah is dry, peel off the outer skin. It should come off fairly easily. Inside, you’ll find the fibrous sponge along with seeds.
Shake out the seeds, then rinse the sponge thoroughly. Some people soak it in a mild bleach solution to lighten the color, but plain water works fine if you prefer a natural look.
After cleaning, let it dry completely, and then it’s ready for use.
9: Storage and Usage
The loofah sponge has several uses combined with your favorite detergent.
You can cut it into smaller pieces for dishes, bathing, or even cleaning around the house. Store it in a dry place between uses to keep it from getting moldy.
And don’t forget to save some seeds for next season. That way, the cycle continues. Just make sure to choose plump and healthy seeds for future planting.
The great news is that properly dried loofah sponges can last for years when stored in cool, dry, dark conditions using breathable containers like paper bags or cardboard boxes.
Conclusion
Sometimes gardening offers more than food on the table or beauty in the landscape. Growing a loofah sponge plant is one of those times. A time when you get a utility or an eco-friendly product that you can use daily in your own home.
Now, instead of buying the scrubbing sponge, consider growing your own. Besides, you now have something you didn’t have a while ago, the information on how to go about it.
If you’ve enjoyed today’s guide, I’d appreciate it if you could share on Facebook or save on Pinterest for future reference in case you’re not yet ready to begin.